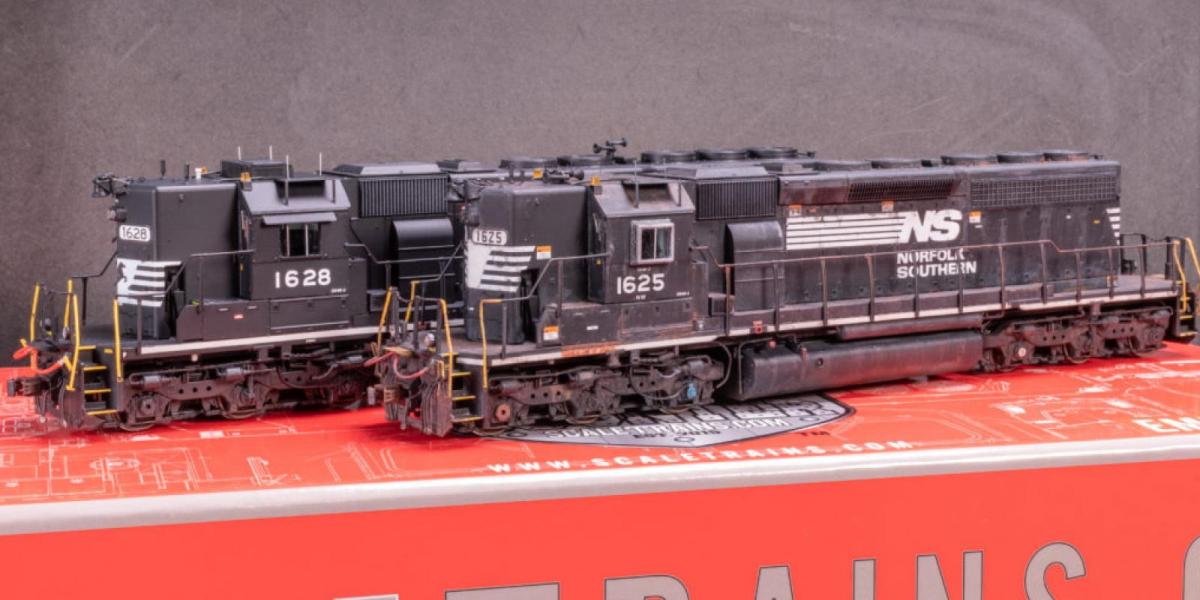
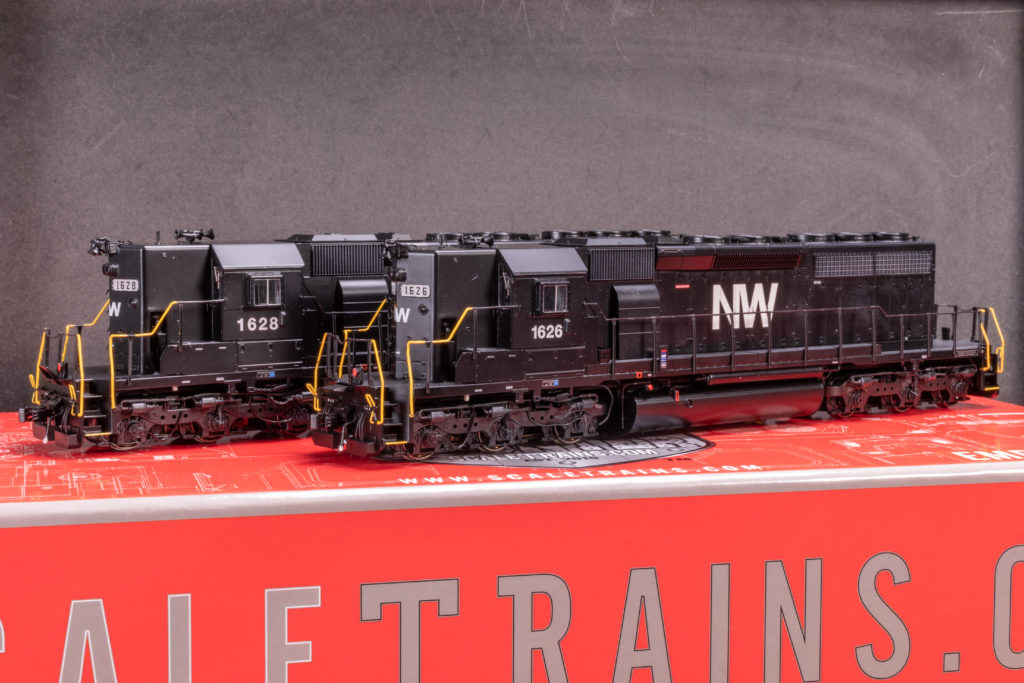
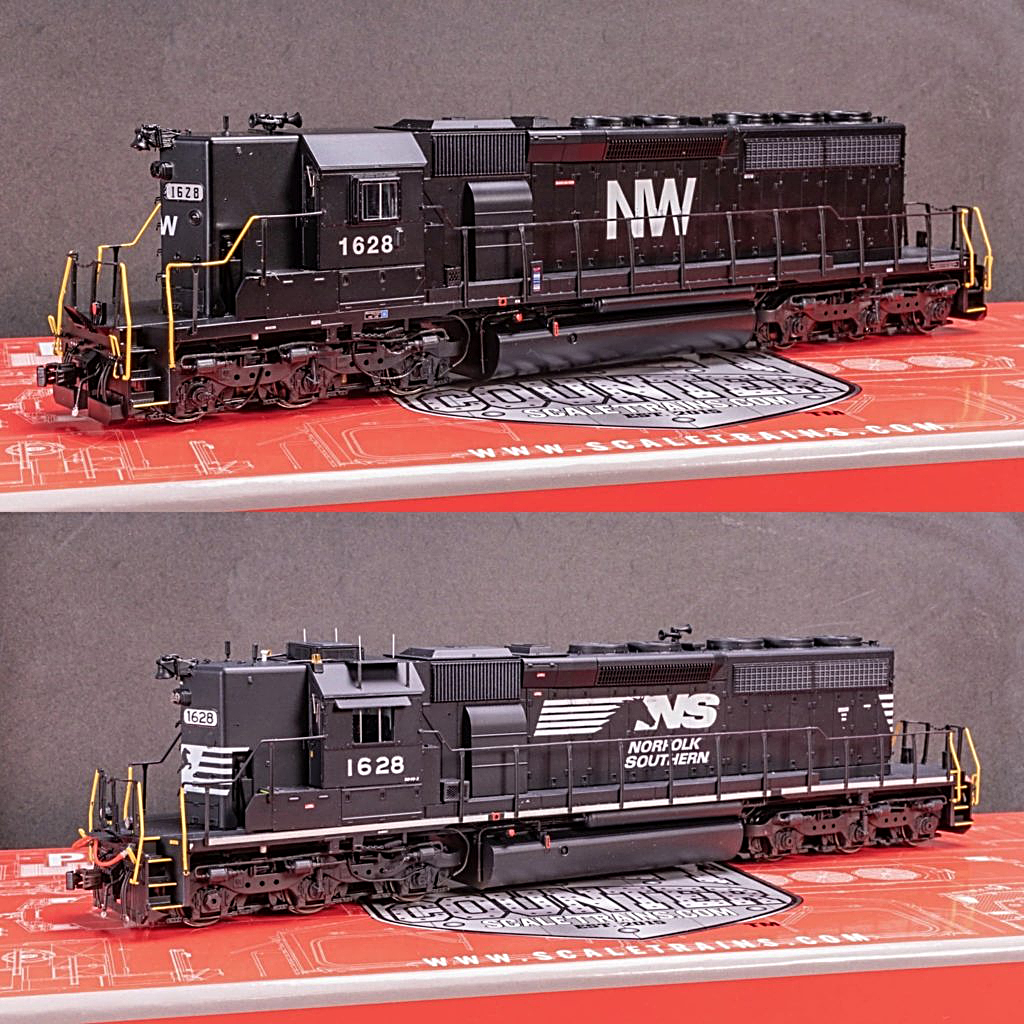
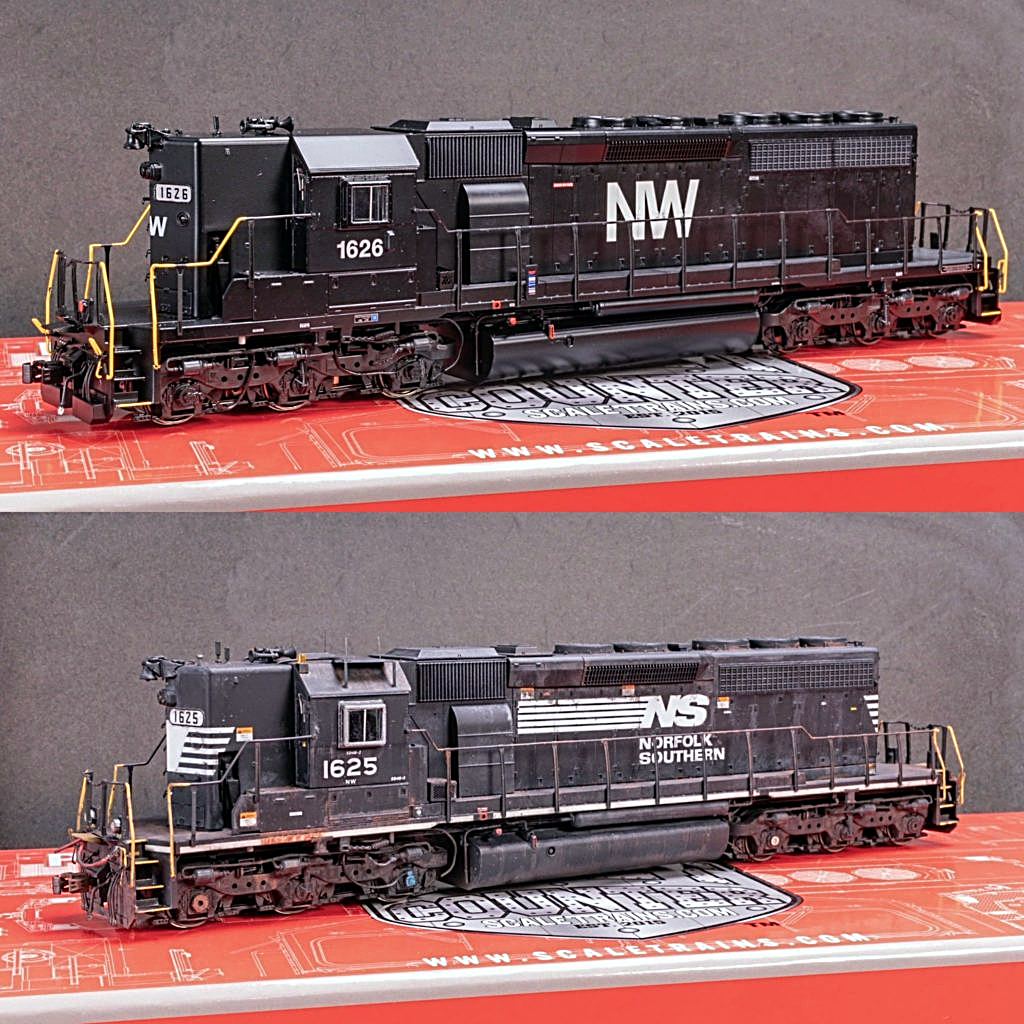
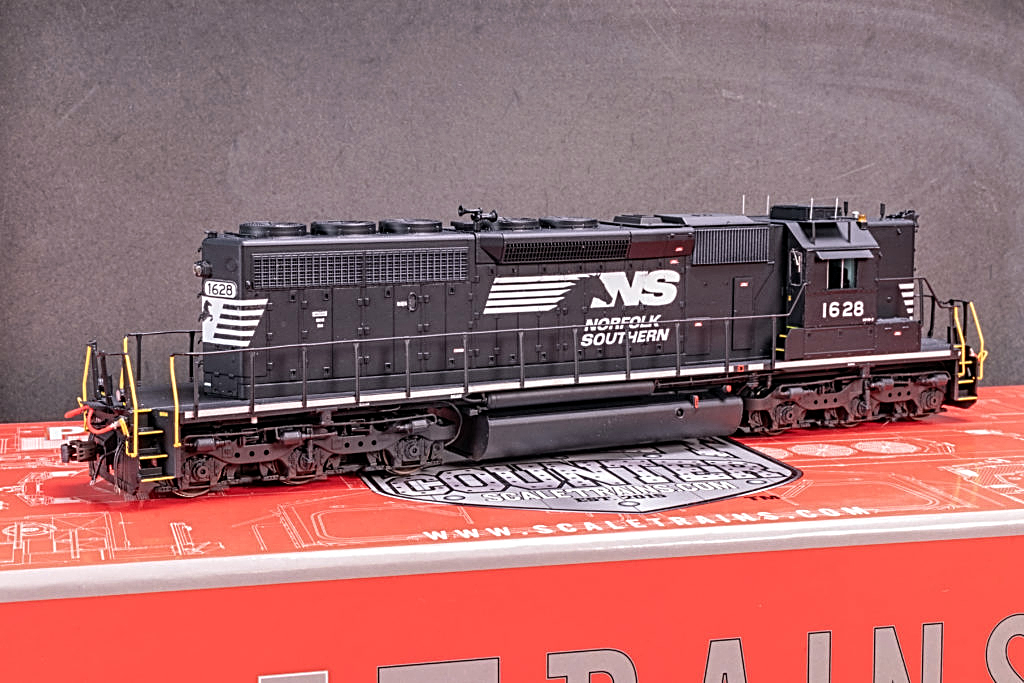
We are proud to feature the marvelous custom modeling work of Arthur Bradley in this week's Time to Model™ feature. In this article, you'll learn how to take one of our Rivet Counter™ HO Scale Norfolk & Western "High Hood" SD40-2 locomotives and convert it to the modern-day Norfolk Southern version. You can find the latest runs of Rivet Counter HO SD40-2s through ScaleTrains.com or through a Select Retailer™.
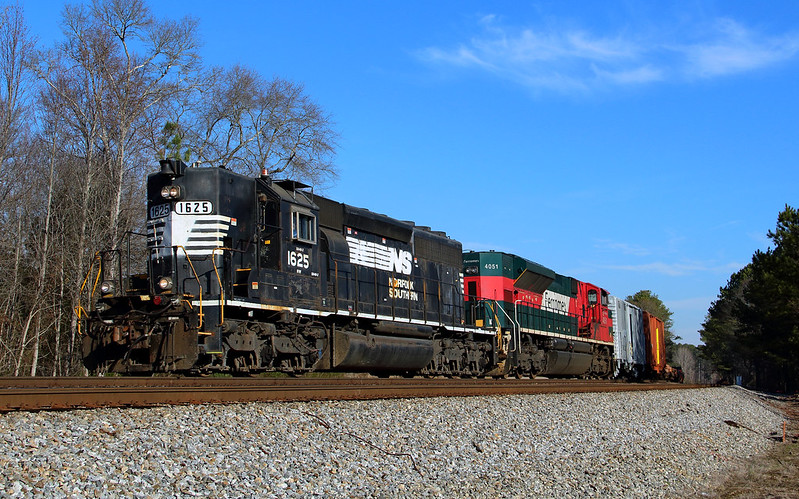
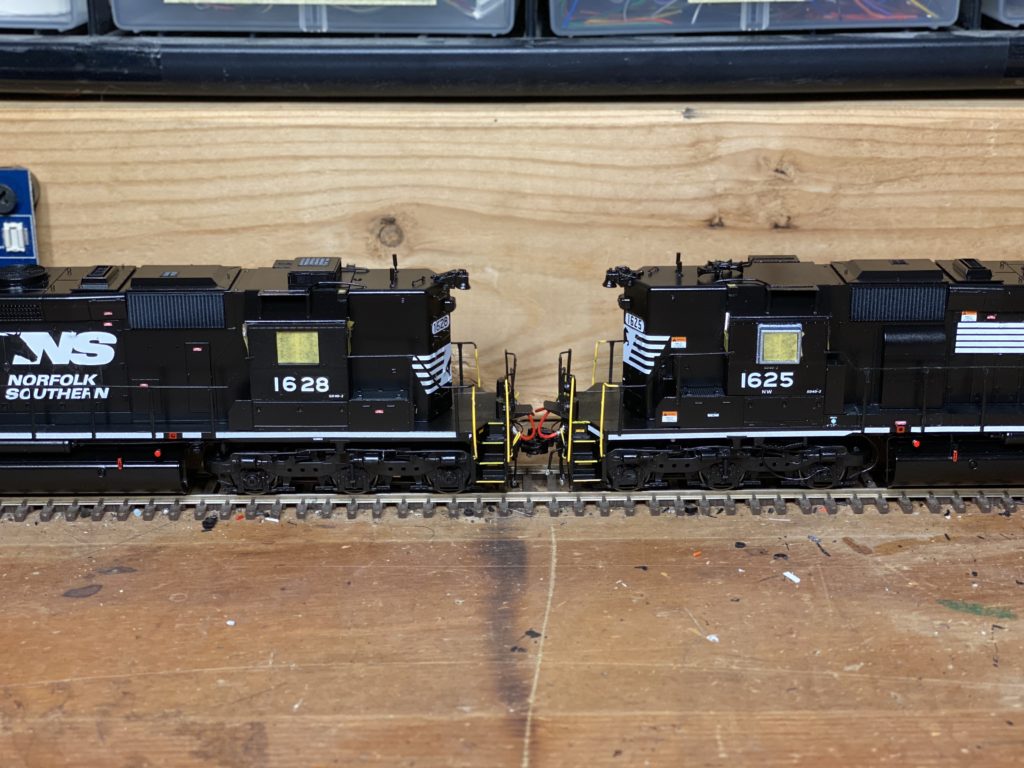
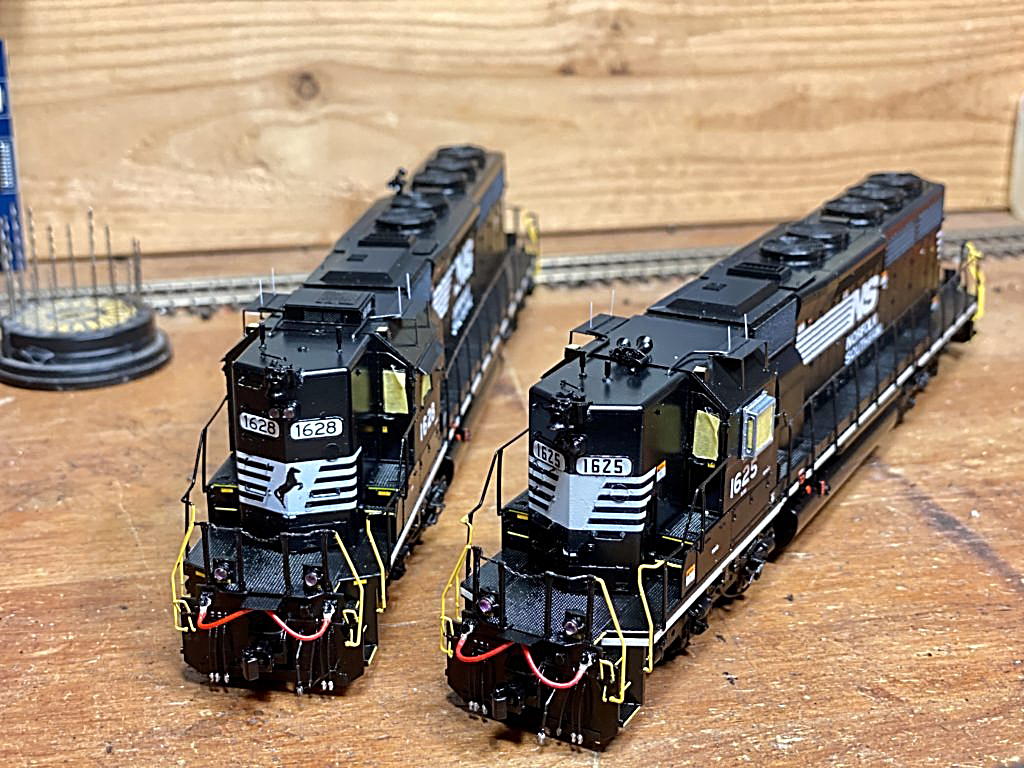
To give the reader some background information on the prototypes, the two locomotives featured in this article are still in service today (as of November 2020) on Norfolk Southern's roster. They are the last of eleven remaining High Hood SD40-2s in existence and remain in yard and local freight service in various cities on the NS system.
Railroad photographer and Norfolk & Western Historical Society Member Ed Painter recalls that: "The 1600s were the last High Hood locomotives ever ordered by N&W and were also the last dual cab controlled locomotives ordered. They were built in 1973 by EMD in LaGrange, Illinois. They saw service on mainline trains on N&W and I shot almost all of them back in the day." Painter captured locomotive 1628 at Brewster, OH in October of 1974.
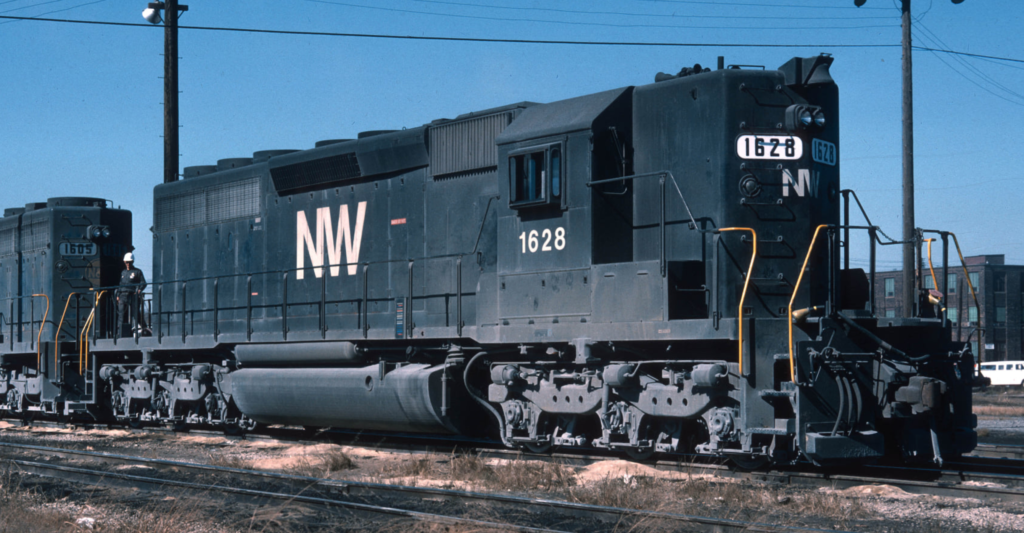
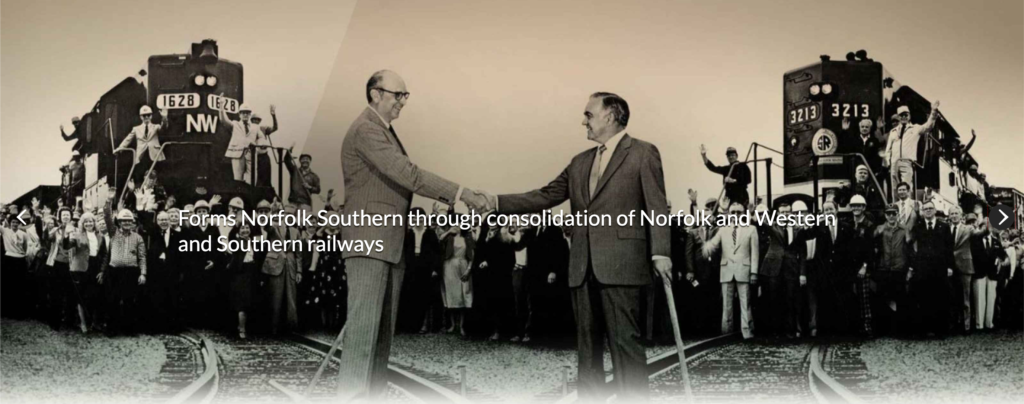
Locomotive 1628 in particular was actually one of the locomotives used in the company's first photo in 1982 which commemorated the merger between Norfolk & Western Railway and the Southern Railway System. Below, the locomotive appears on display with Southern Railway High Hood no. 3213 with CEO Robert Claytor (N&W) and CEO Harold Hall (SOU) shaking hands in order to commemorate the merger.
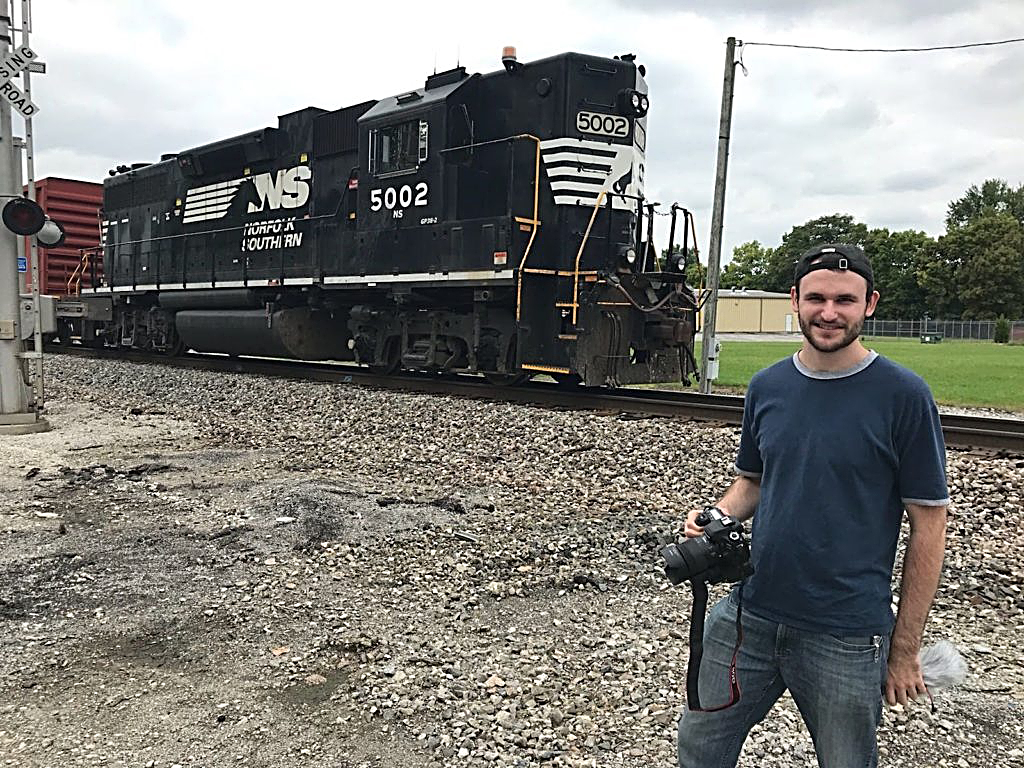
After pulling trains for NS in mainline service for three decades, no. 1628 was equipped with radio-control equipment in the mid-2000s for yard switching service. In 2015, the locomotive was repainted into Norfolk Southern's distinctive "Horsehead" paint scheme and was equipped with an airconditioning unit atop the cab. Most recently, the locomotive spent time working Oakwood Yard in Detroit, Michigan on "home rails." These units spent a lot of their daily service life along the former Wabash mainline between Detroit and Kansas City early on in their careers. Delay In Block Productions captured video footage of the locomotive in action, along with sister SD40-2 no. 1630.
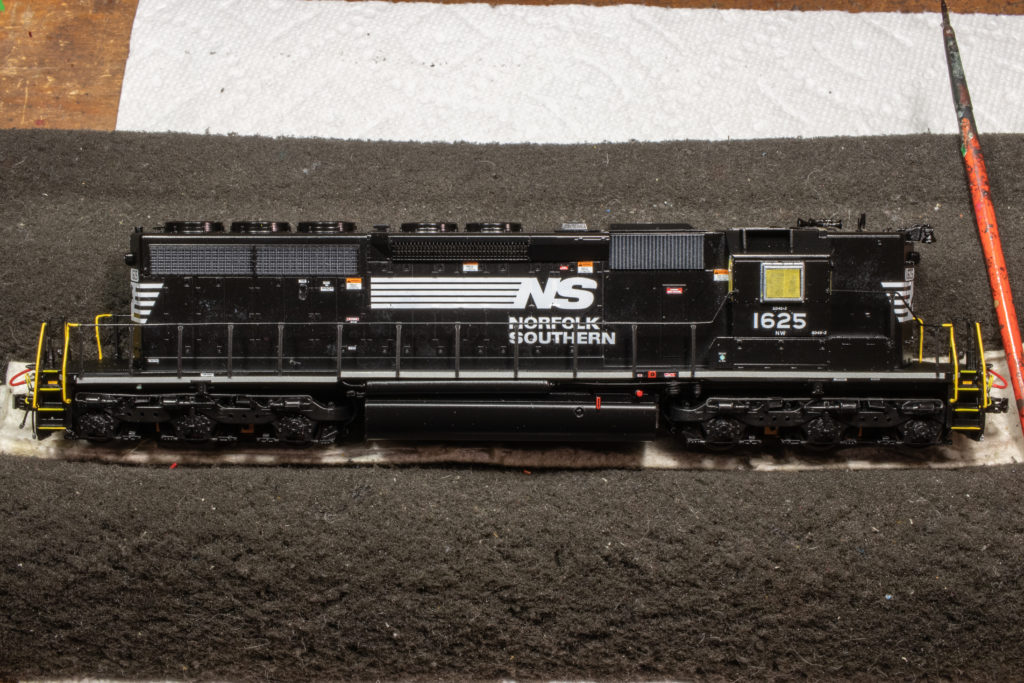
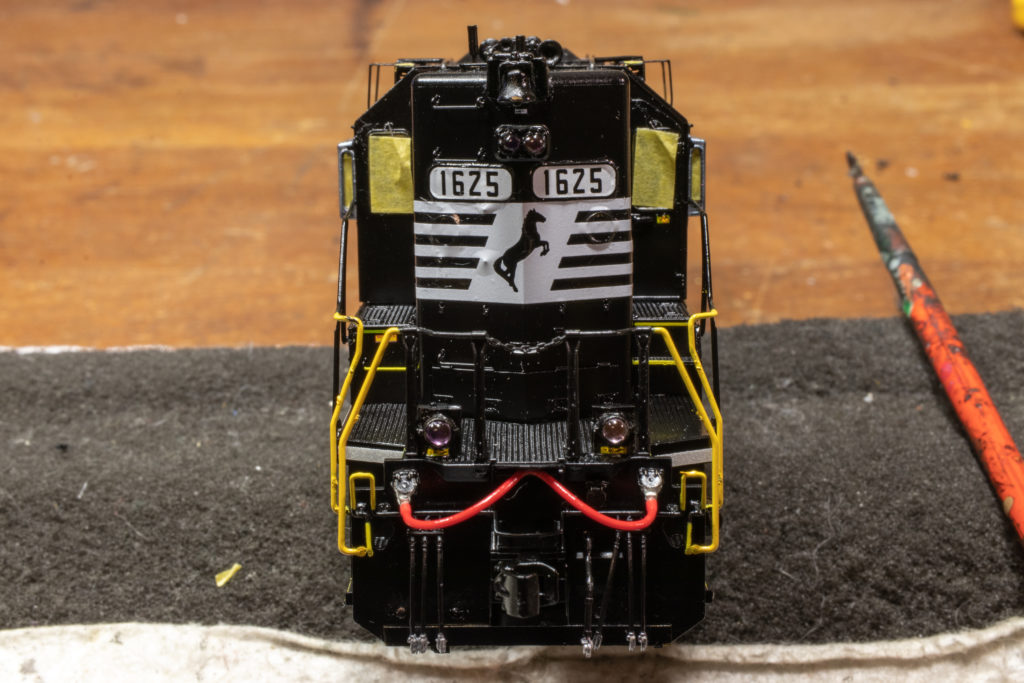
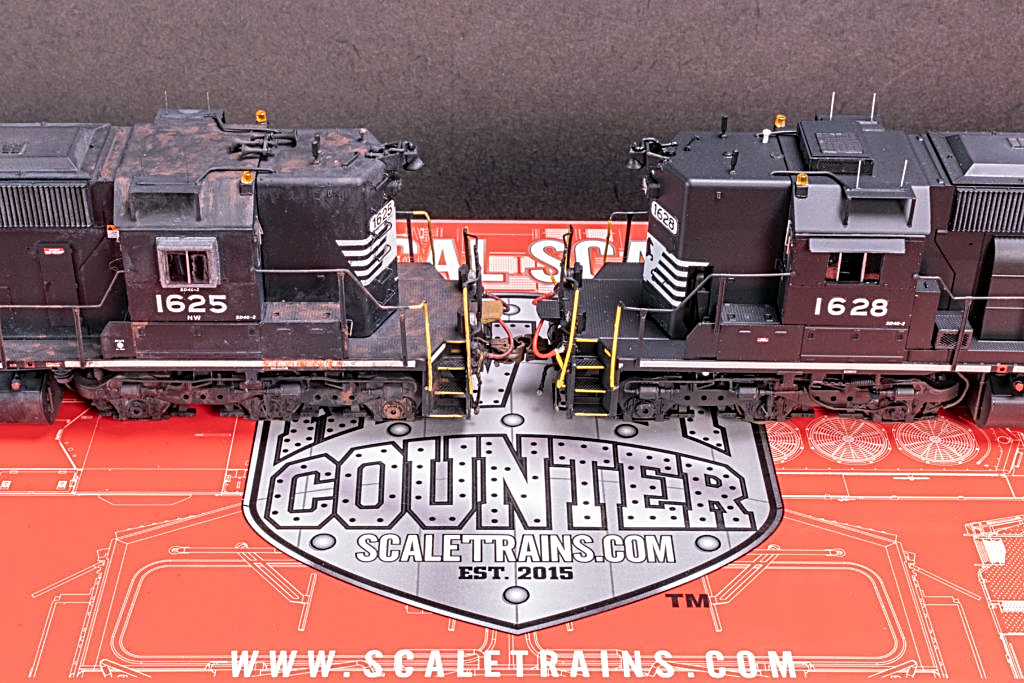
Norfolk Southern no. 1625 is unique to the NS roster because it does not have a horse on the nose logo. Due to some damage on the nose, a repair was made and spray paint was used to clean up those nose. As a result, the horse was painted over several years ago and the locomotive continues to operate as a "horseless" iron horse in both local and yard service. In 2017, the locomotive led rare maintenance of way train over the Alabama Great Southern (AGS) mainline between Atlanta, Georgia and Irondale, Alabama. Photographer Bradley Bates captured the locomotive in action at Heflin, Alabama as it led the train west towards Irondale. There, the locomotive was taken off as the leader and placed into hump service at E. Norris Yard.
We spoke with Bates who remembers the day well. "I was at work when I heard that NS work train 945 had High Hood SD40-2 no. 1625 leading. I remember thinking to myself, 'This is a joke! No way this can be true!'," Bates exclaimed. He continued: "But a few minutes later, I saw a photo on Facebook of the train on the mainline in South Carolina - heading for the Alabama Division. I thought, 'Well, Norfolk Southern will just take it off in Atlanta and send it back 'home'" - as I knew that unit was assigned to the Carolina region and mostly for yard/hump service. I got up before daylight the next morning just to make sure that wasn't the case. By that time, 945 was getting ready to depart Atlanta still having no. 1625 in the lead. I couldn’t believe it and needless to say, the chase was on! That was my first time shooting a Norfolk Southern SD40-2 High Hood in a few years and my first time ever catching a former N&W High Hood SD40-2. It's definitely a train I’ll remember forever!" said Bates.
Now that you're more familiar with these iconic locomotives, you'll probably want to convert your own modernized Norfolk Southern version. Arthur Bradley's how-to instructions will show you how to do just that.
How to Convert a ScaleTrains N&W SD40-2 to Norfolk Southern
A Modeling Guide by Arthur Bradley of BradleyDCC Custom Models
Photos by the Author
Parts List:
- ScaleTrains.com Norfolk & Western High Hood SD40-2 (DCC/sound optional)
- Microscale Micro-Sol decal setting solution
- Microscale Micro Kristal Klear Glue
- Loctite Super Glue
- ShellScale Decals HO152 “Norfolk Southern EMD Early Factory Paint”
- ShellScale Decals HO168 “Norfolk Southern Soaring Logo GE D8-40C/D9-40C” (optional use for Horsehead logo)
- ScaleScale Decals HO140 “Locomotive Data” ScaleScale Decals HO135 “Locomotive Designations”
- ScaleScale Decals HO103 “8” Black EMD/GE Numbers”
- or HO124 “Conrail/NS style”
- or HO106 (for Horsehead paint units)
- Microscale MC-5016 “EMD Data SD70ACe” (for “Smart Start” logos)
- Smokebox Graphis #R487 “White Locomotive Stripes” (optional use for late NS version, or decals)
- (8) Warm White SMD 0603 LED’s
- (2) Warm White SMD 0402 LED’s (2) Details West DL-228 Ditch Lights
- (1) Details West RA-157 Firecracker Radio Antenna
- (1) BLMA/Atlas #4551 “Removed Headlight Cover” for plating class lights (optional use for late NS version)
- (1) BLMA/Atlas #4550 “RCL Antenna Stands” (optional use for late NS version)
- (1) Details Associates #2903 “Flasher Xenon strobe” (or similar, optional use for late NS version)
- (1) Plano #11894 “Coupler Knuckle Basket, 20x20x14” (optional)
- Misc. Brass Sheet for pilots
- Clear Gloss, Semi-Gloss or Flat Finish of your choice
- Misc. Weathering Supplies (optional)
Step 1 Removing the lettering:
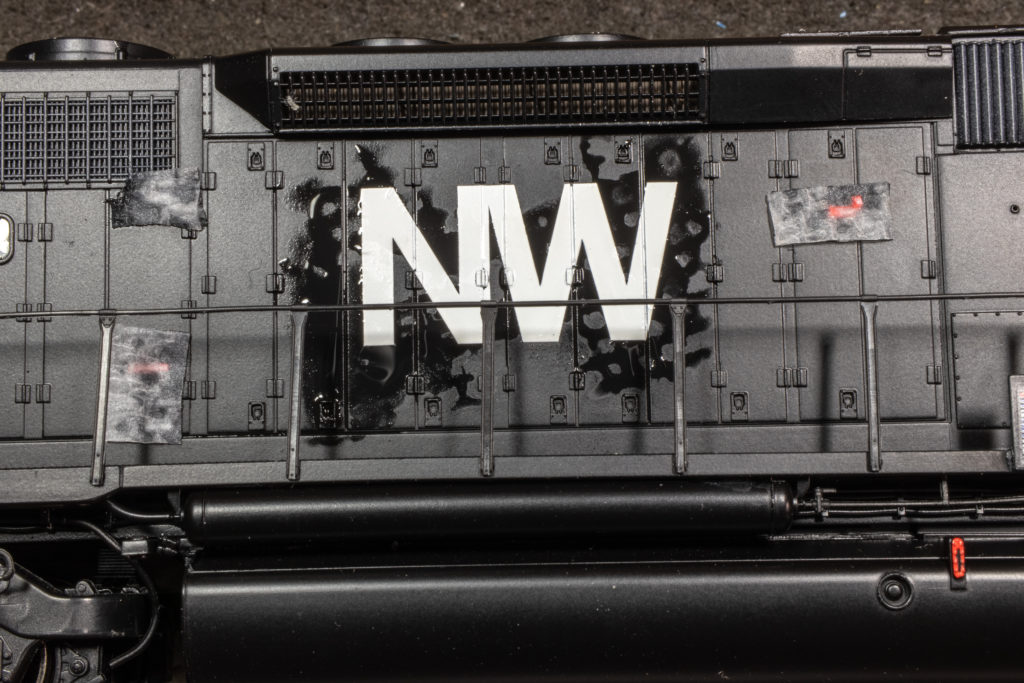
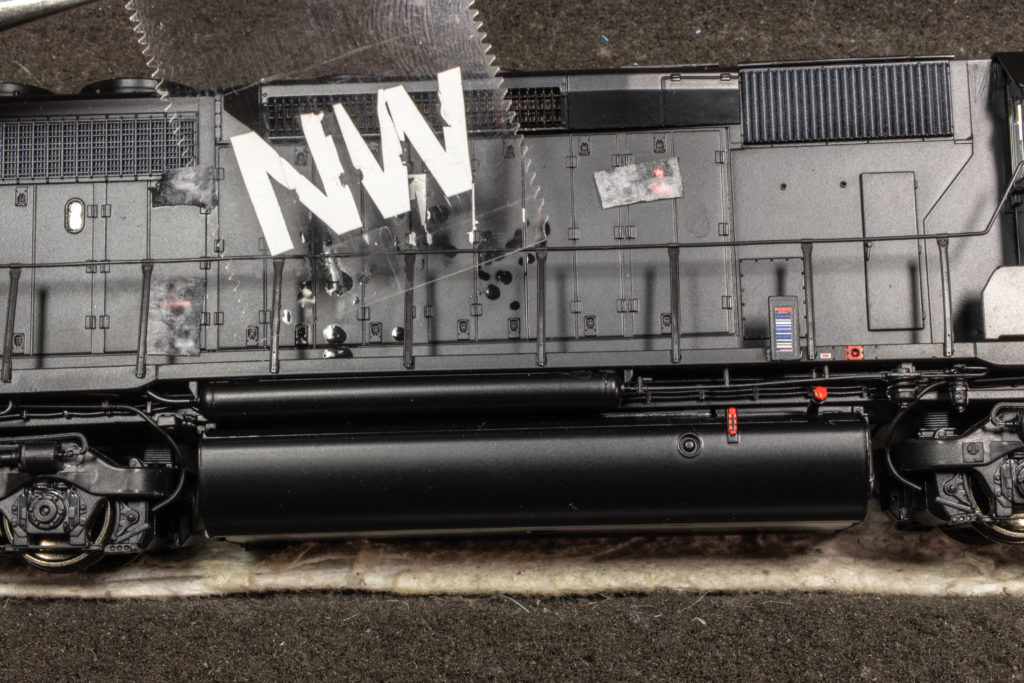
We will first start by removing the original logos, numbers, and warning labels. To do this, cut out several pieces of paper towel (double ply works best), soak it in the Micro-Sol solution, and lay over the printing that is to be removed. Make sure to cover all areas including the side and end logos, cab numbers, and hood warning labels (these will be in a different position on the NS repaints).
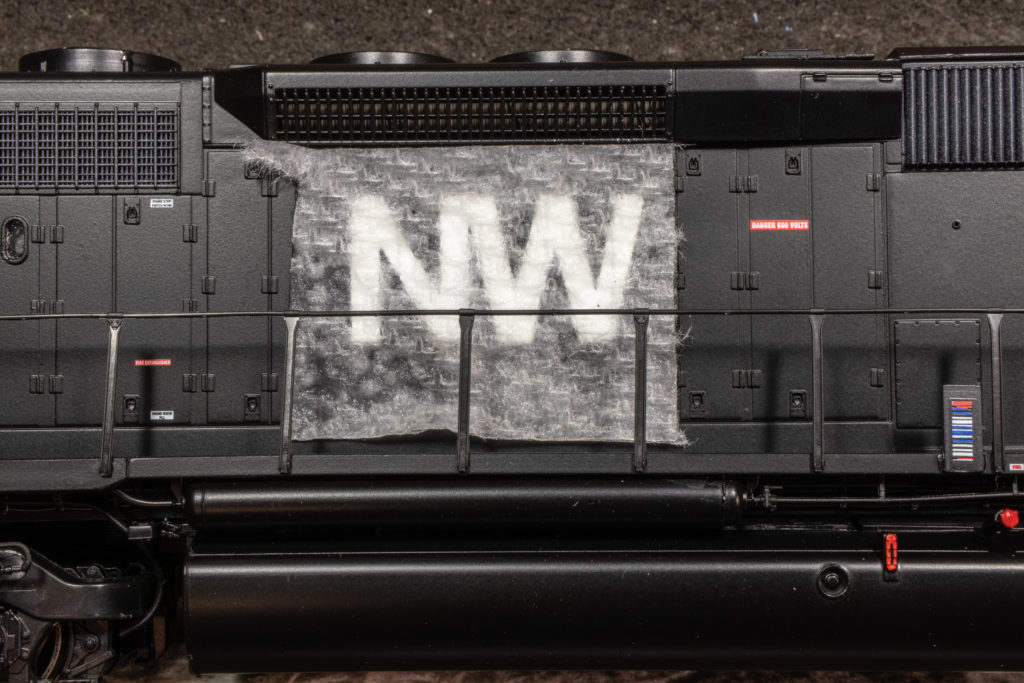

It will need to sit for at least 30 minutes (more is better) in order to fully soften the printing. While it's sitting, we can prepare the number boards. In order to do this, you will need to remove them from the model and scrape or file off the numbers and background from the backside. The new decals will be applied to the outside so once done, you may go ahead and re-install the number boards.
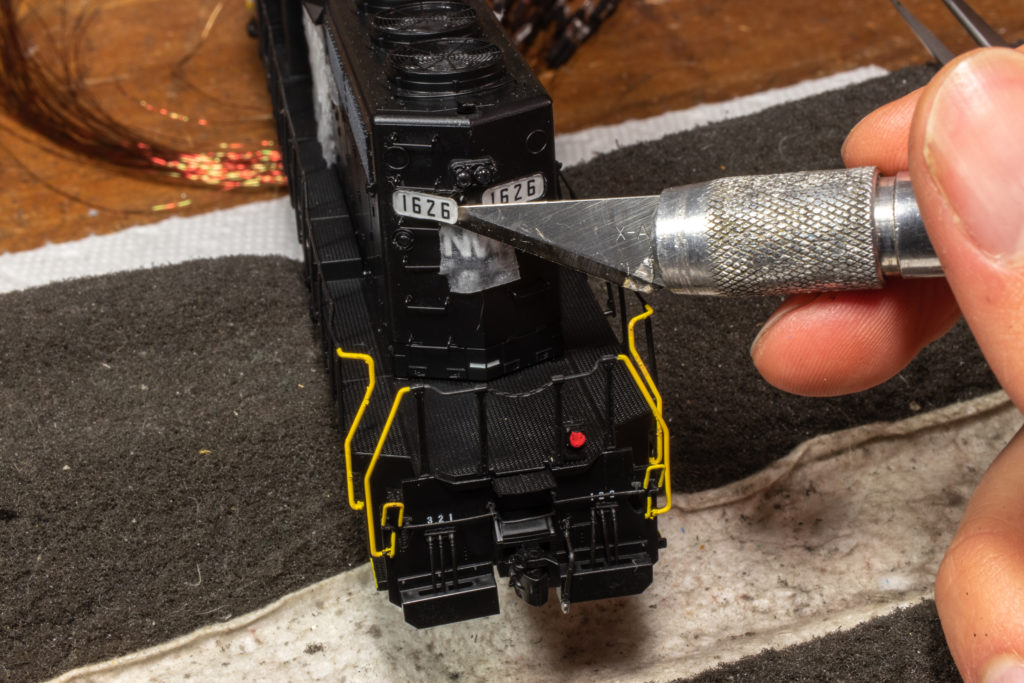
Note that they are “right side up” - so make sure you put back in the same orientation that they were removed. Now, go back and check the soaked paper towels. If they have been on long enough, the printing will appear “wrinkled." Once this happens, you can lay a piece of mailing tape over the printing and burnish it on using a dull toothpick. Peel back the tape and it should remove cleanly. If any printing remains re-apply tape as necessary.
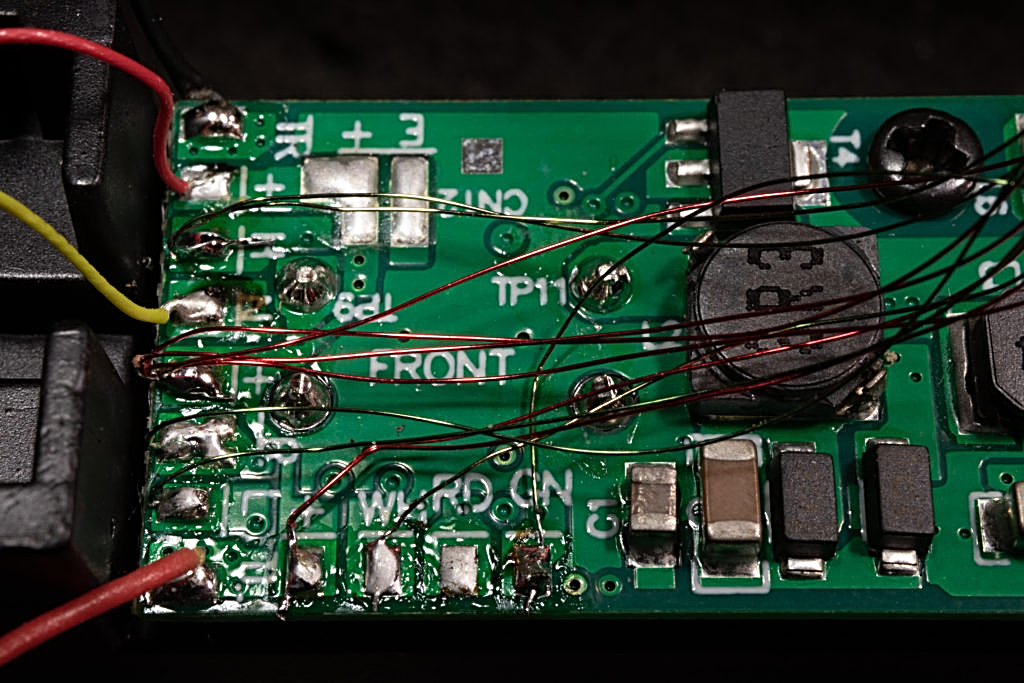
Step 2 Wiring:
Before we apply the new decals, we’ll finish the internal wiring. This means adding the Ditch Lights and RCL lights (optional). Start by measuring and drilling the holes for your ditch lights on the deck. When using the metal Details West ditch light castings, make sure your LED contacts are insulated with paint before installing inside the housing. Test fit and when confident of placement, glue the 0603 SMD LED’s inside the housings. The ditch light LED wires are connected to “L” & “R” on the circuit board (which stands for left & right ditch light). Attach the positive end to the “+”. These tabs are already pre-programmed for flashing ditch lights on the decoder as well. If installing the RCL lights, use the “WH” & GN” connections, which we found to be controlled by AUX7/8, and then re-program these to the “Random Strobe” effect on the LokSound decoder. We also replaced the headlights with an individual SMD LED for each headlight lens to maintain an even color/brightness to the overall model. When finished, tape and/or wire wrap the wires so as not to pinch anything when putting the shell back on (also be careful of the sanding lines!).
Step 3 Details:
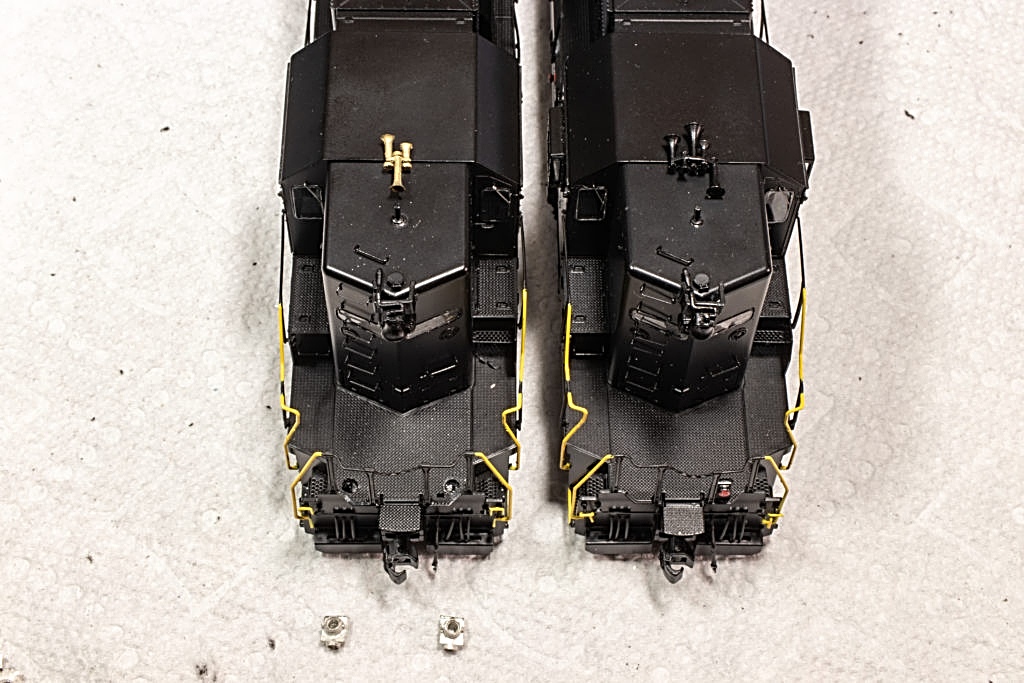
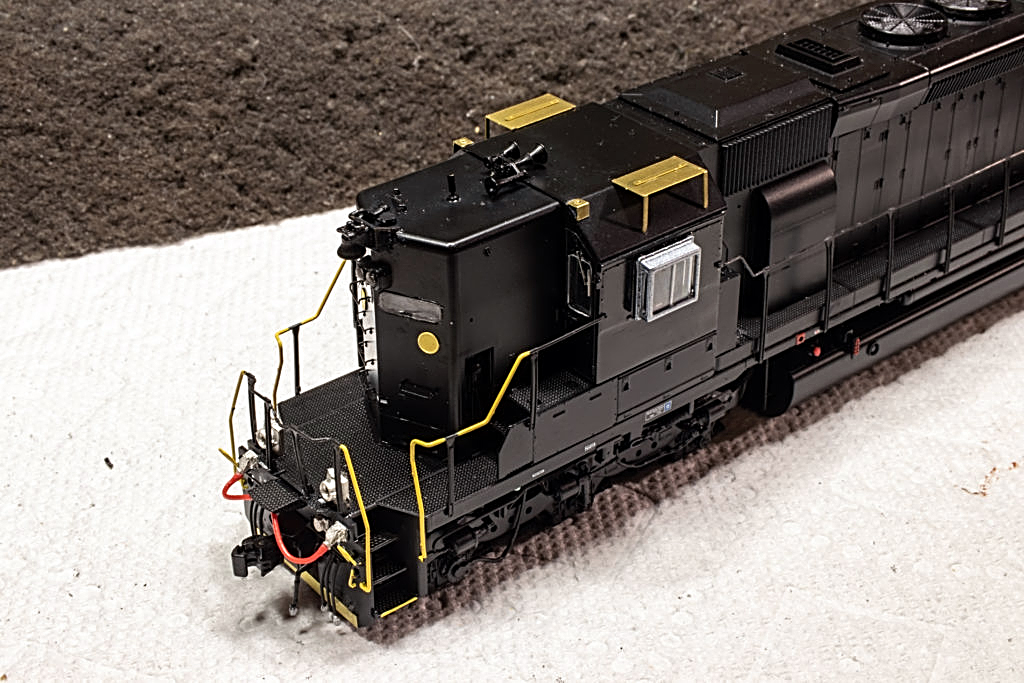
You can use these model photos as a guide, however different prototype details may vary. Since this version of #1625 will be done in the modern, present-day look, we will be adding the RCL lights and stands. Start by cutting out and filing the Atlas/BLMA parts. The shorter leg on the antenna stand will be removed and long leg shortened to fit correctly. Attach one of the 0402 LED’s underneath the small strobe stand.
Once the glue is dry, make sure to paint the bottom to prevent any light leakage later on in the install. Measure twice before drilling holes in the cab roof to ensure proper alignment! A pro-tip here is to use a single toothbrush bristle for the radio antenna. It not only looks convincing - but is also flexible and resistant to breaking. Check for additional details here as well - including the Firecracker antenna, GPS device, and conduit cable coming from the antenna stands.
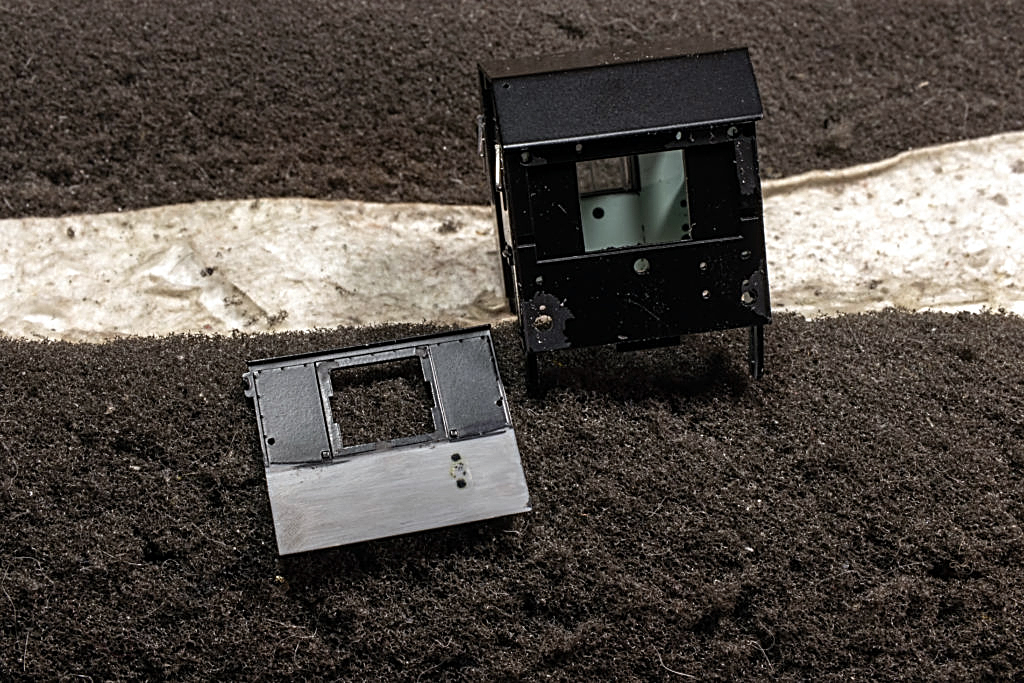
Next, we'll move on to work on the cab sides. There is a vent that will need to be removed. This is best achieved by taking the cab side off the model. Slide a sharp hobby knife under the edge and carefully pry until the (5) tabs pop out holding it on. The vent may be cut and trimmed off as close as possible finished by sanding flush and repainting the lower half of the cab. At this time, the all-weather windows were painted silver to match the prototype.
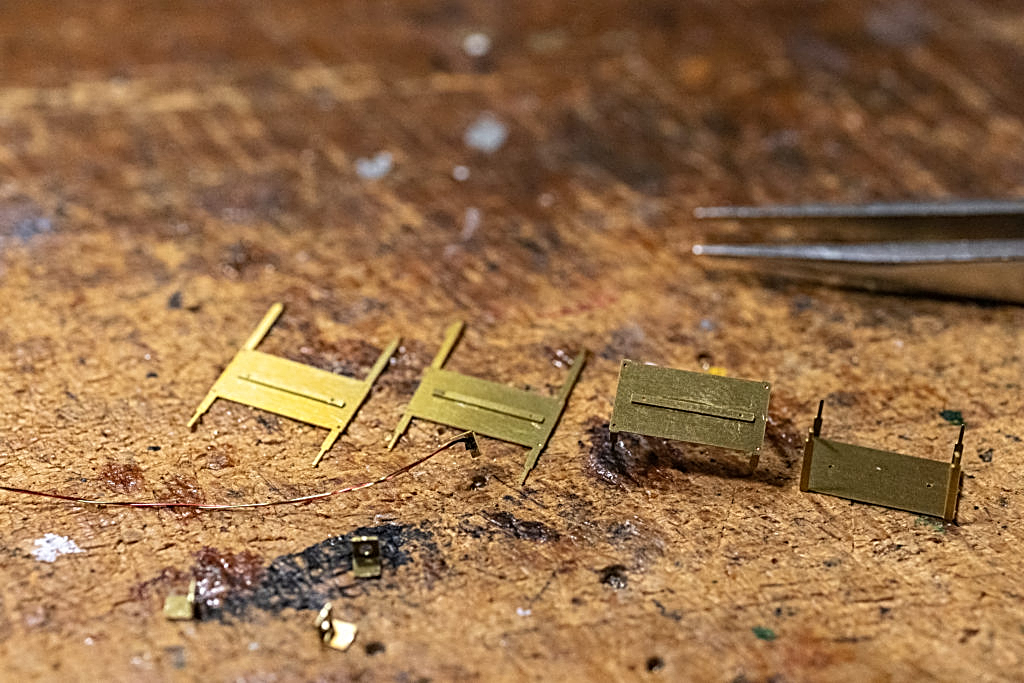
Pilot details include the removal of the MU hose boxes and relocation of the MU cable. A thin sheet of brass cut to size provides the lower trim. For the cable, use a 28 gauge red decoder wire with the core removed to connect the Details West MU receptacles.
The class lights will need to be carefully trimmed with a sharp hobby knife, then apply the brass plates to cover.
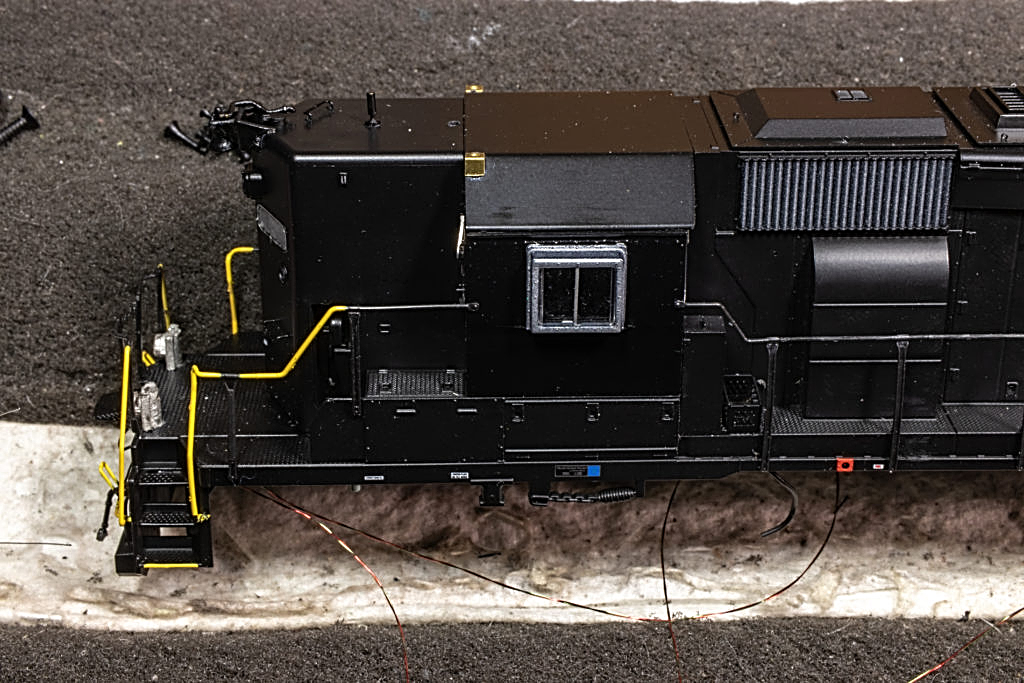
The stock knuckle basket is replaced with the square NS style using the brass Plano part. Fold the sides and use glue or a small amount of solder to hold the sides together.
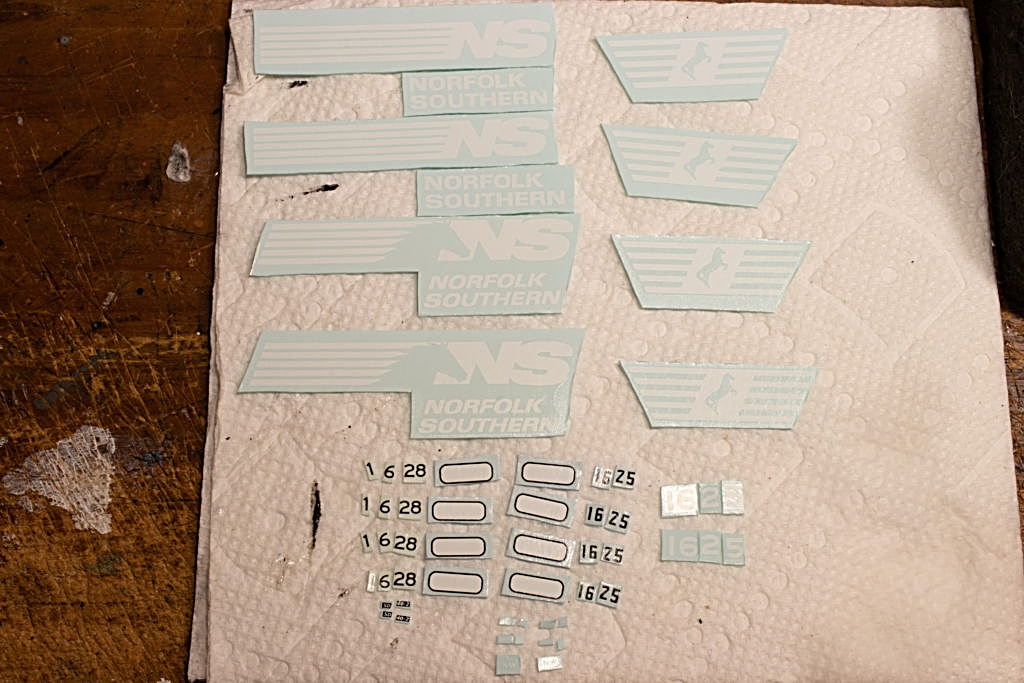
Step 4 Decals:
First, the model will need to have a gloss sealant applied, as a smooth service is ideal for decaling. Tape off all the windows and lights to keep these clean. Once the sealant is airbrushed, allow the model to sit overnight to fully dry.

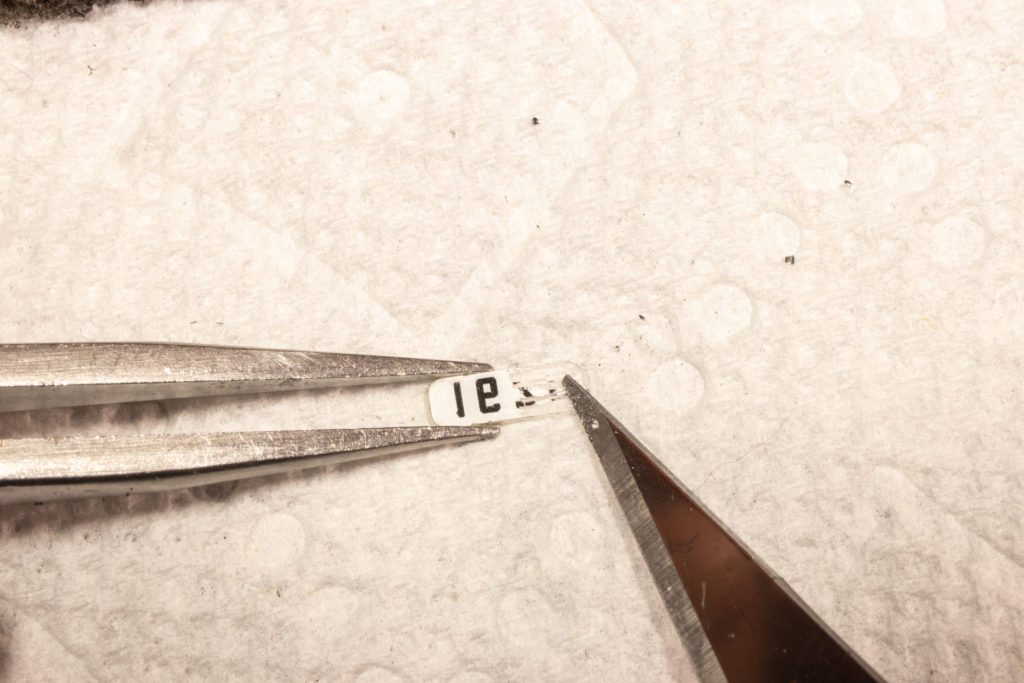
Start by cutting out the needed logos, cab numbers, number boards, & number board backing. The warning labels are very small, so it is best to cut these out and apply as you go so you don’t lose them.
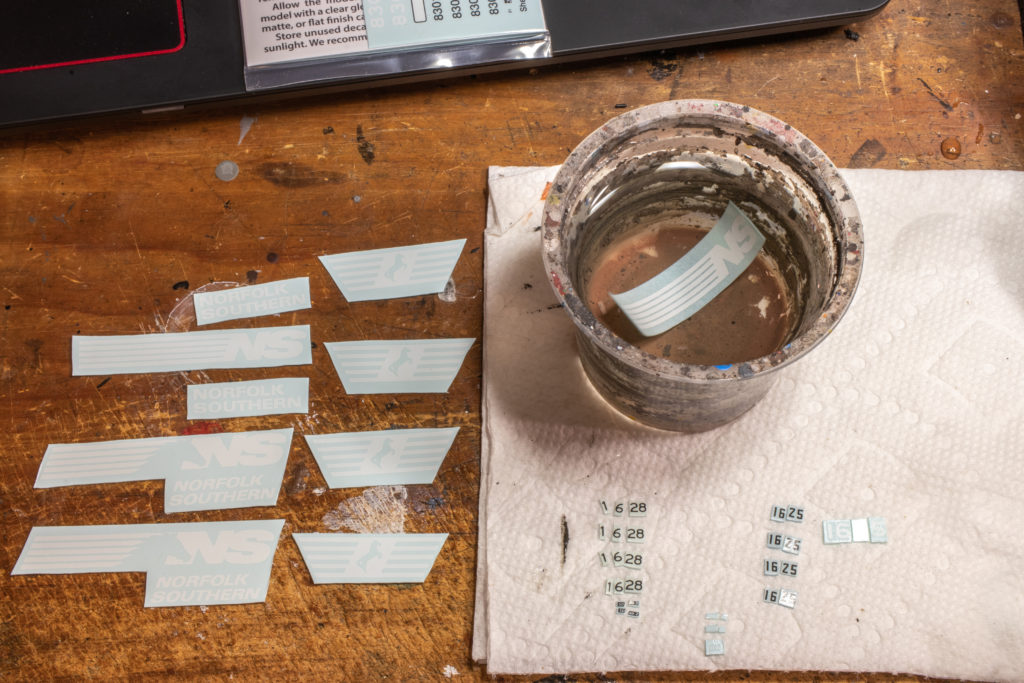
Soak the decal in-room temperature-luke warm water for approx. 10-30 seconds until the decal can easily slide on the backing paper (but not until fully separated). Apply the Micro-Sol solution where you will be applying the decal and slowly slide it off the backing paper into position. Maneuver it with tweezers or a toothpick to get proper alignment. Let the decals dry overnight and then prick any air bubbles with a hobby knife and re-apply the solution. Repeat this process as necessary. For the end logos, remove the grab irons first so the decal can lay flat. Once finished, these may be re-applied.
The sill striping used on these models is reflective tape from Smokebox Graphics. Decals may be used instead if preferred. Remove the handrails by gently prying off using the hobby knife, a caliper, or other measuring device is handy here to cut the striping to length.

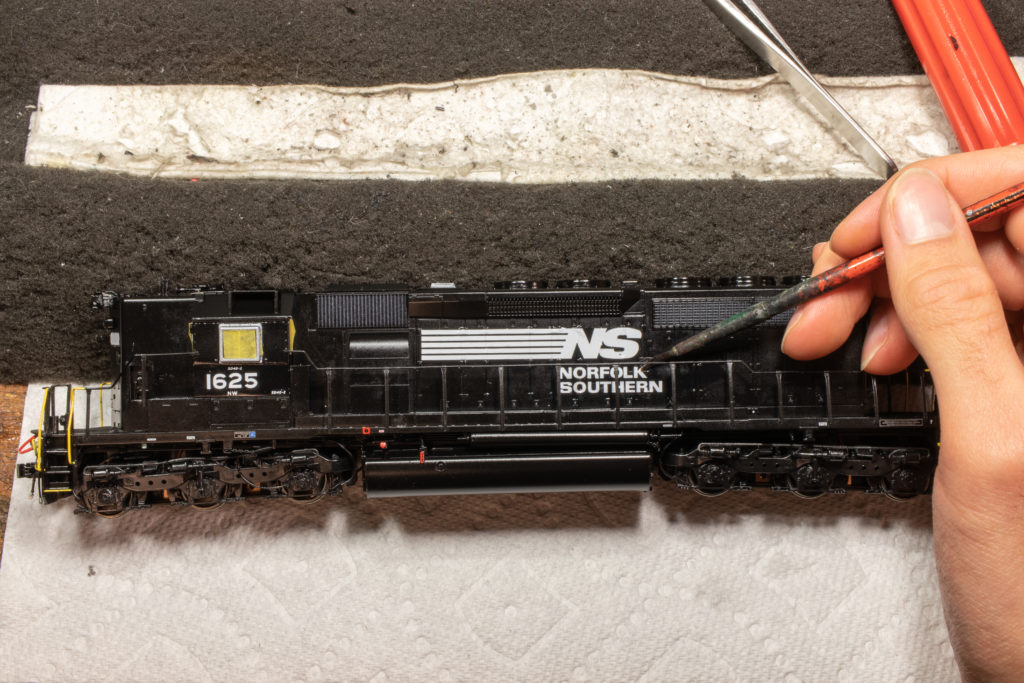
The step edges are painted yellow using a small pin vice, needle, or toothpick to apply paint.
Step 5 Completion:
Ensuring all details are painted, decals fully set, grab irons and handrails re-applied, LED’s correctly wired and programmed, and anything else finished up - you may proceed to the final finish. Use a semi-gloss or flat coat to seal in the decals and protect the painted parts. If desired, you may weather as necessary.
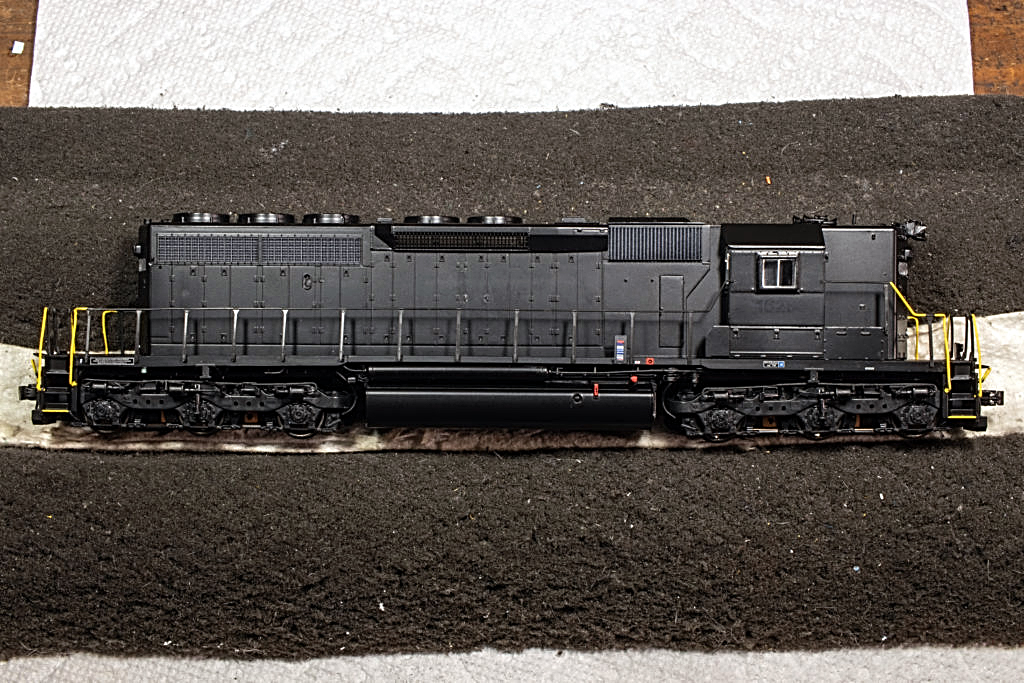
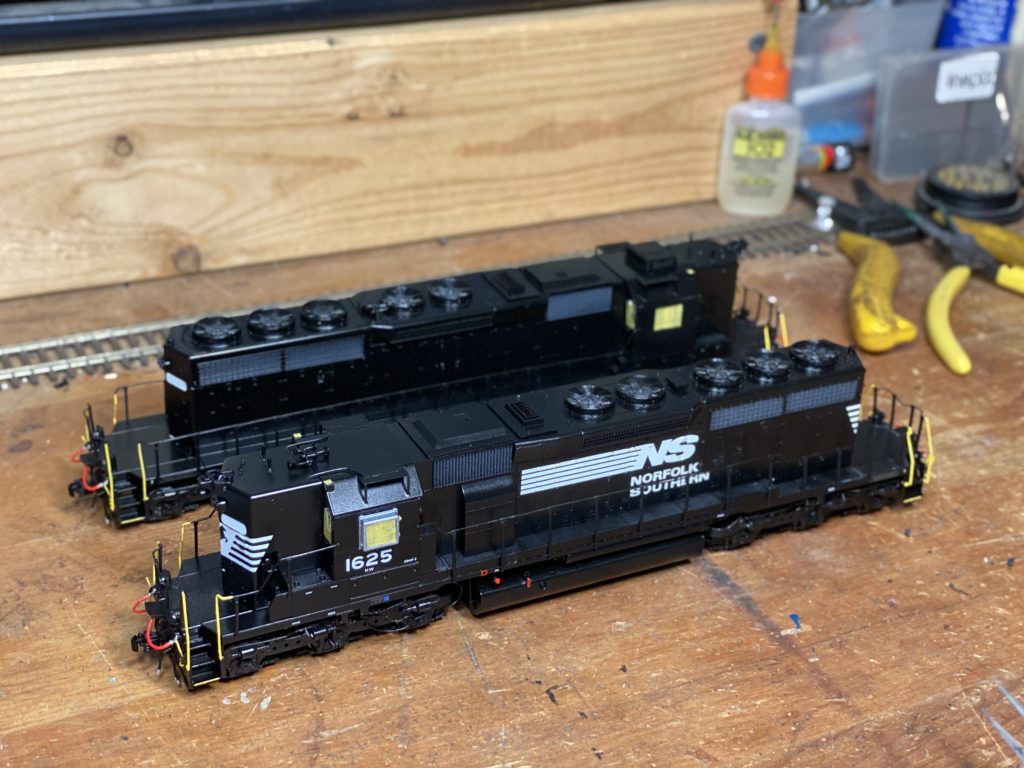
Voila! You now have a Norfolk Southern High Hood SD40-2.

About the Modeler:
Specializing in DCC, LED lighting services, and weathering - Arthur Bradley has been building custom HO model trains since 2008. At the time, he was only 12. "I had to hide my age for a long time because most customers wouldn't believe someone under 16 could build custom models like these. I let my work speak for itself for the longest time," said Bradley. Since delivering his first customer project, Arthur, now 24, has custom-built over 1,000 locomotives for customers all over the world. Originally from Illinois, Arthur now resides in Anderson, Indiana where he works full-time as the owner of BradleyDCC Custom Models.
You can see more of Arthur's amazing work here: https://www.bradleydcc.com/